
High-Fidelity Prototyping: How to Verify Ideas without Writing a Single Line of Code
Discover the power of High-Fidelity Prototyping and how it allows you to verify your ideas without writing any code.
Table of Contents
You know that feeling when you get a great idea for a project? Everything’s falling into place and you can't wait to see your brand-new app. Sometimes, the time between initial idea and first clickable demo could take months, demolishing your enthusiasm in the process. How do we prevent this?
The answer is high-fidelity prototyping.
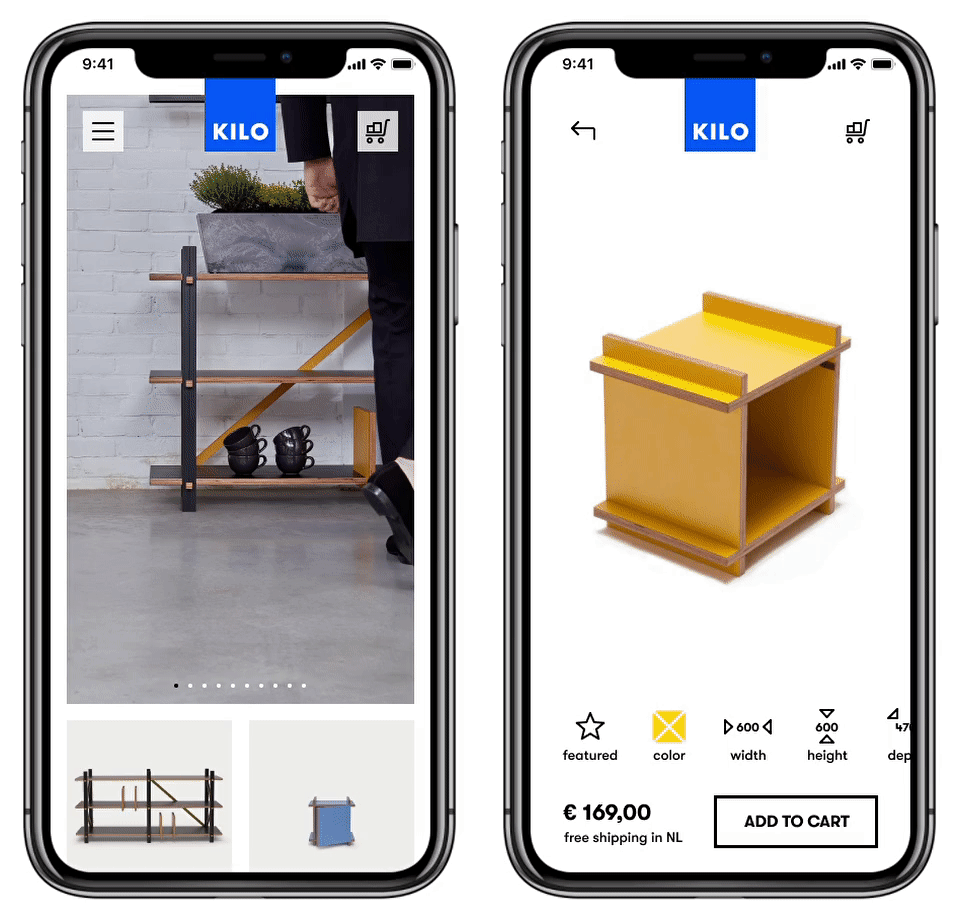
So, what are high-fidelity prototypes and what benefits do they bring to a project?? In short, a high-fidelity prototype is functional and interactive. It represents a design as close as possible to the final design of an app... all without writing a single line of code. The prototype behaves like a live app and you can even interact with it or conduct user testing sessions. In general, it’s the fastest way to experience that “finished” feeling.
You're probably asking, “What’s the difference between high- and low-fidelity prototypes?” From one point of view it’s the length of time it takes to deliver the result—lower fidelity costs you less time. Let’s have a look at that from another perspective and see what we are losing with each fidelity downgrade.
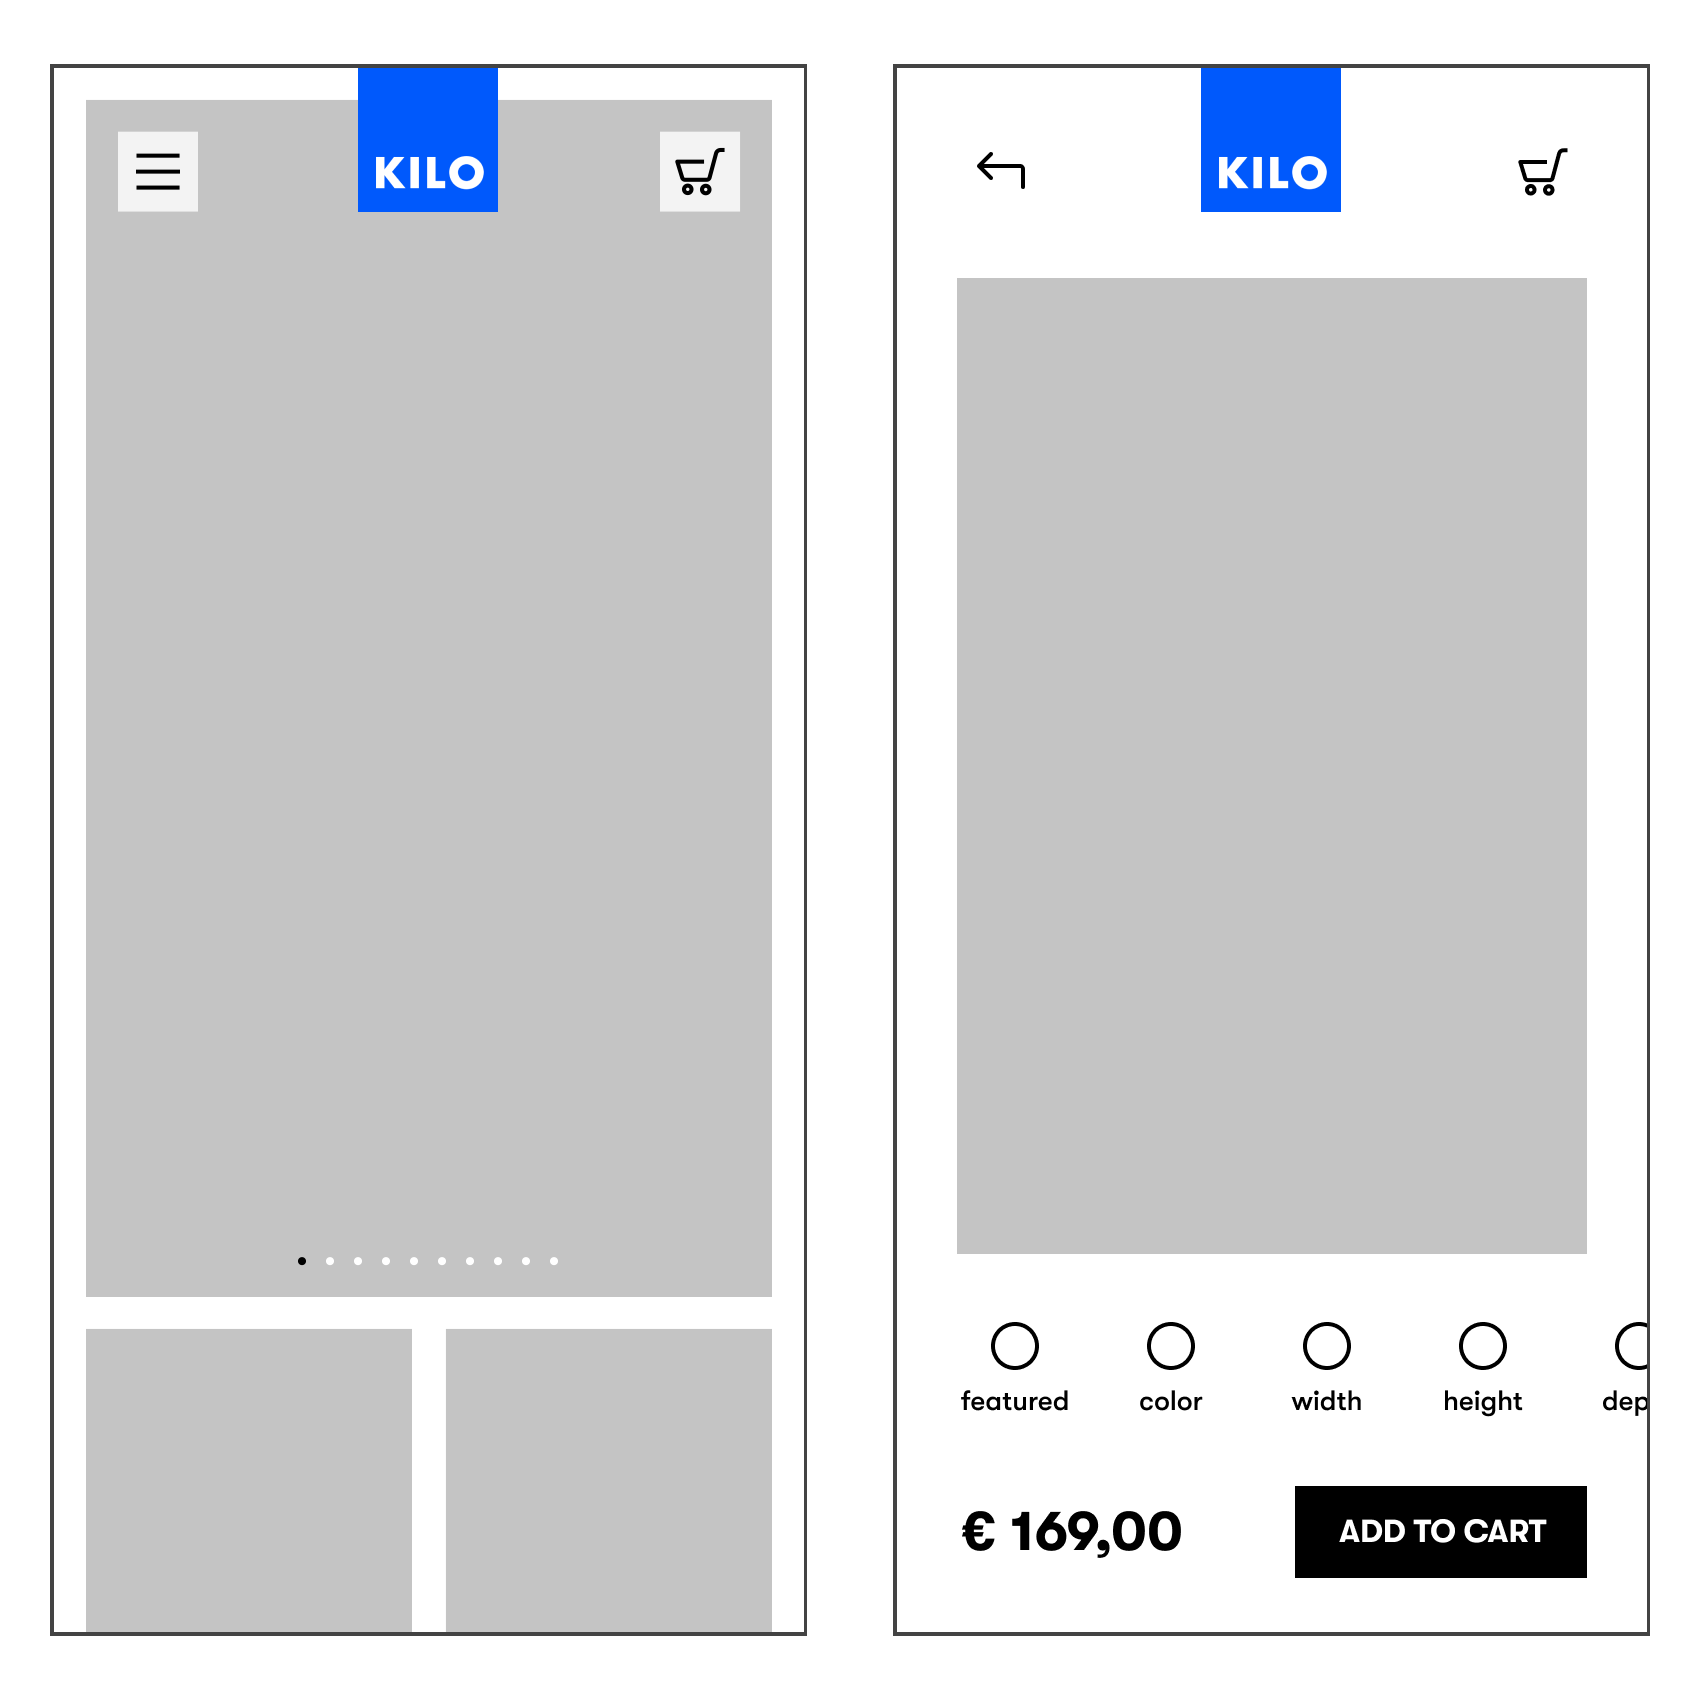
Here is a static mockup without images and icons. That feeling isn’t quite there, but low-fidelity mockups give you an idea about the functional aspect of each view. It’s useful for big projects that contain dozens of similar subpages or websites when you are waiting for perfectly polished images. If you downgrade the fidelity even more, you end up with a hand-drawn wireframe:
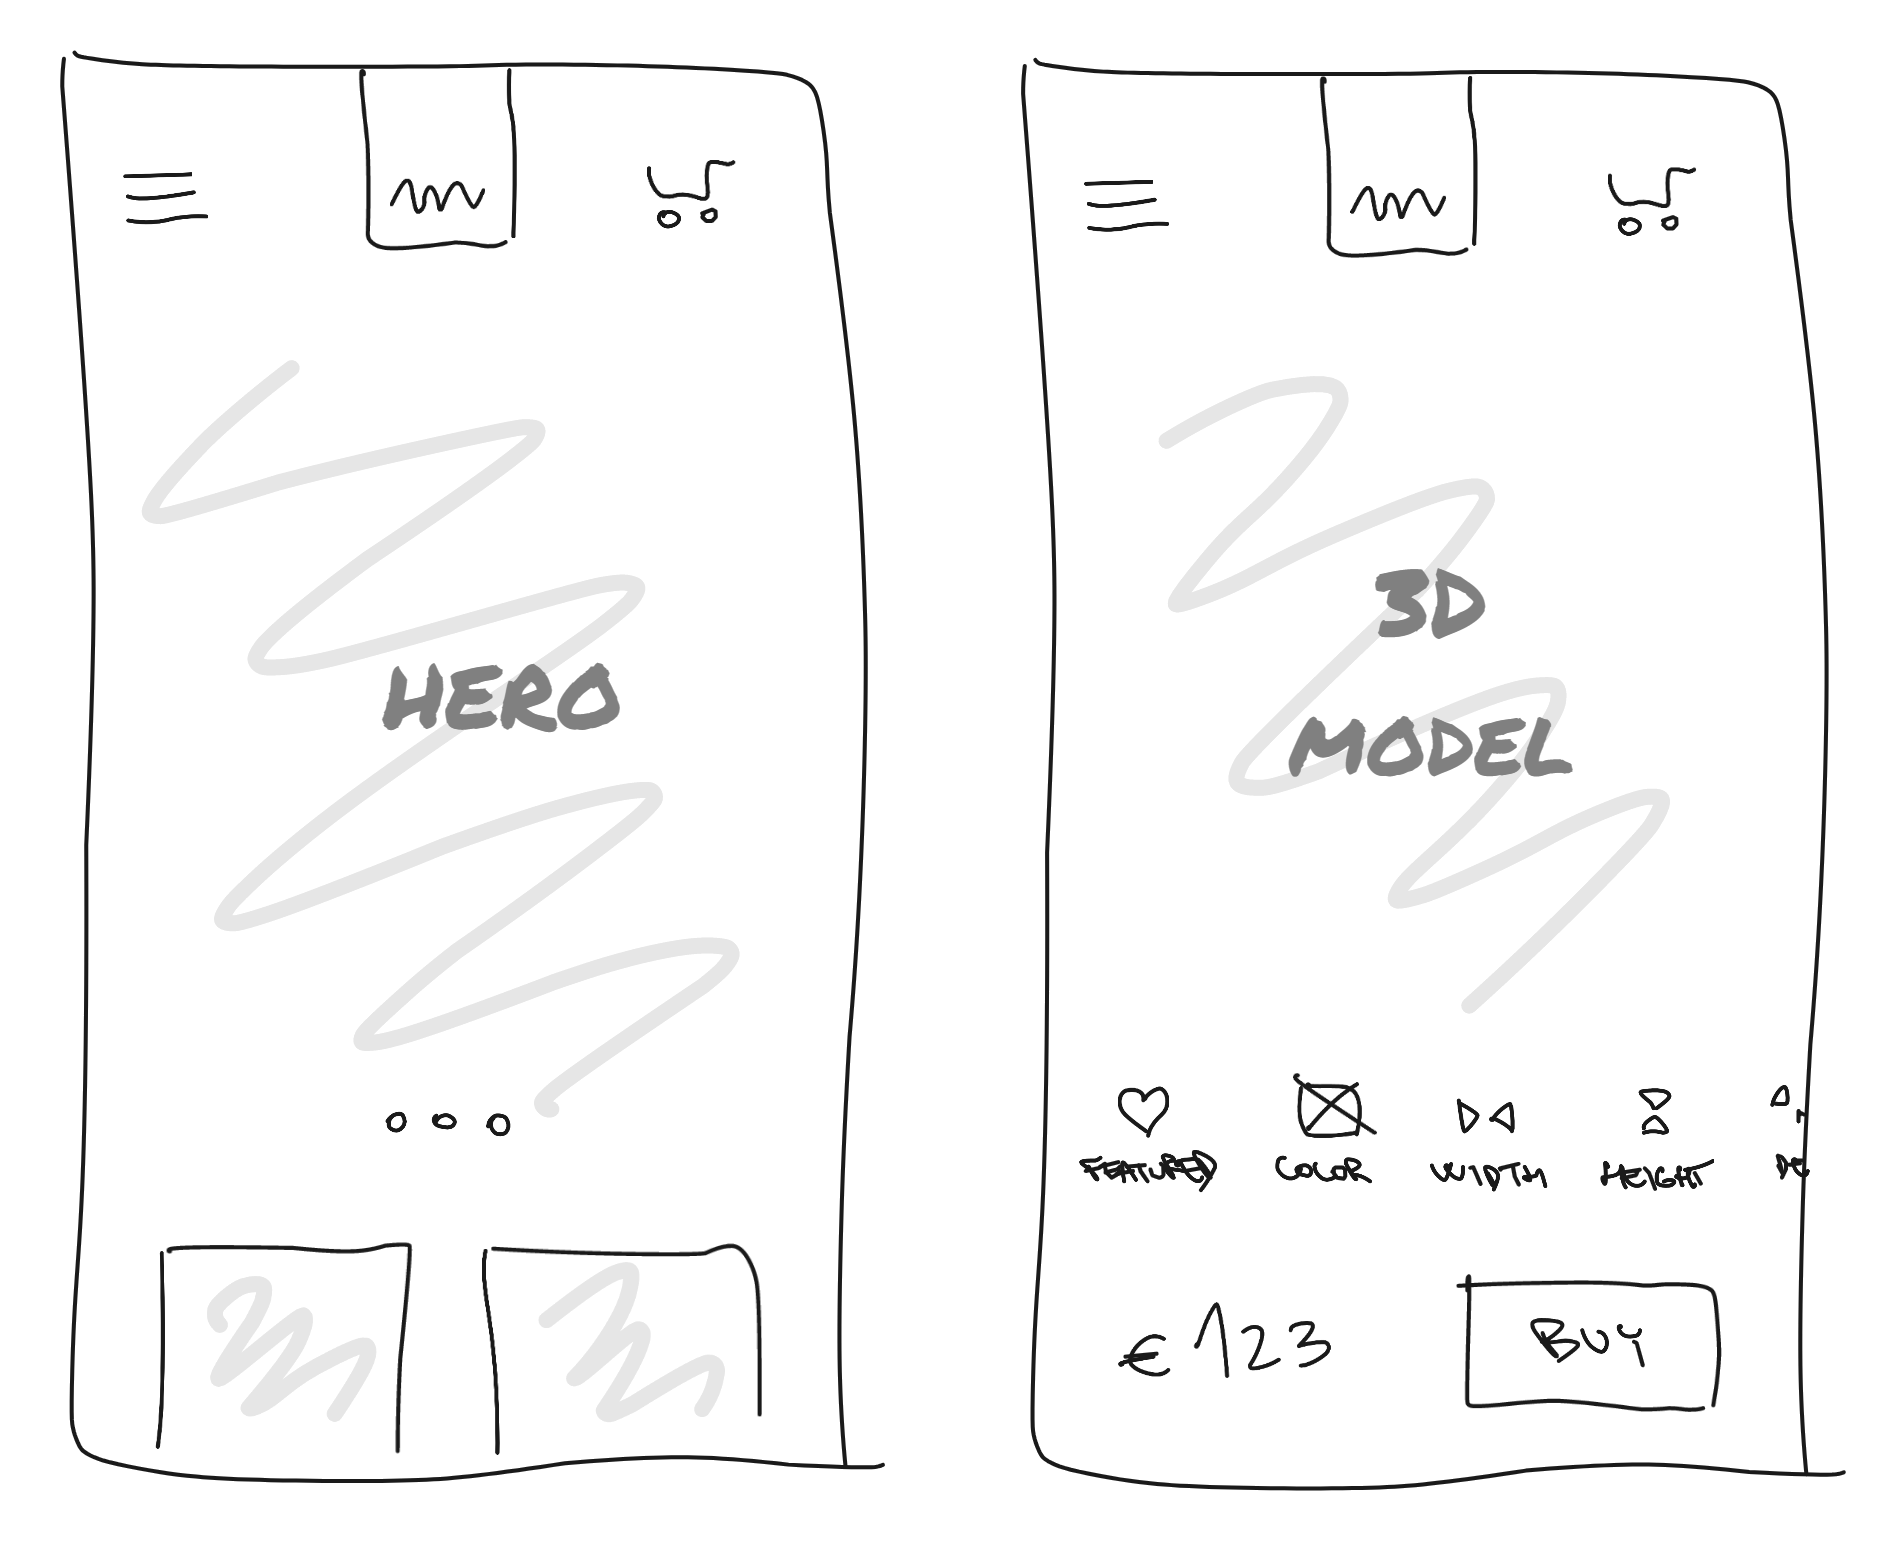
Obviously the hand-drawn wireframes are far from showcasing the end result, but they are great for conveying ideas and what’s important. As this is a fast way to iterate your prototype, it serves well during the initial Design Sprint or other creative meetings. Your teammates won’t get bored while you are sketching it. Pixel perfect alignment isn’t vital and the velocity of sketching is enough to keep everyone focused.

We now know that different levels of fidelity bring us different advantages. We are also aware that in the initial phase we can start with hand-drawn wireframes for capturing main ideas, then move on to a more precise prototype to get an overall feeling. It’s desirable to identify the main flows of your app and prototype those that you’ve found. Doing this, you will end up with a clickable prototype that behaves like a live app. My personal preference is to start with hand-drawn wireframes during the initial meeting and prepare high-fidelity prototypes later that are more of a one-to-one match with the real implementation.
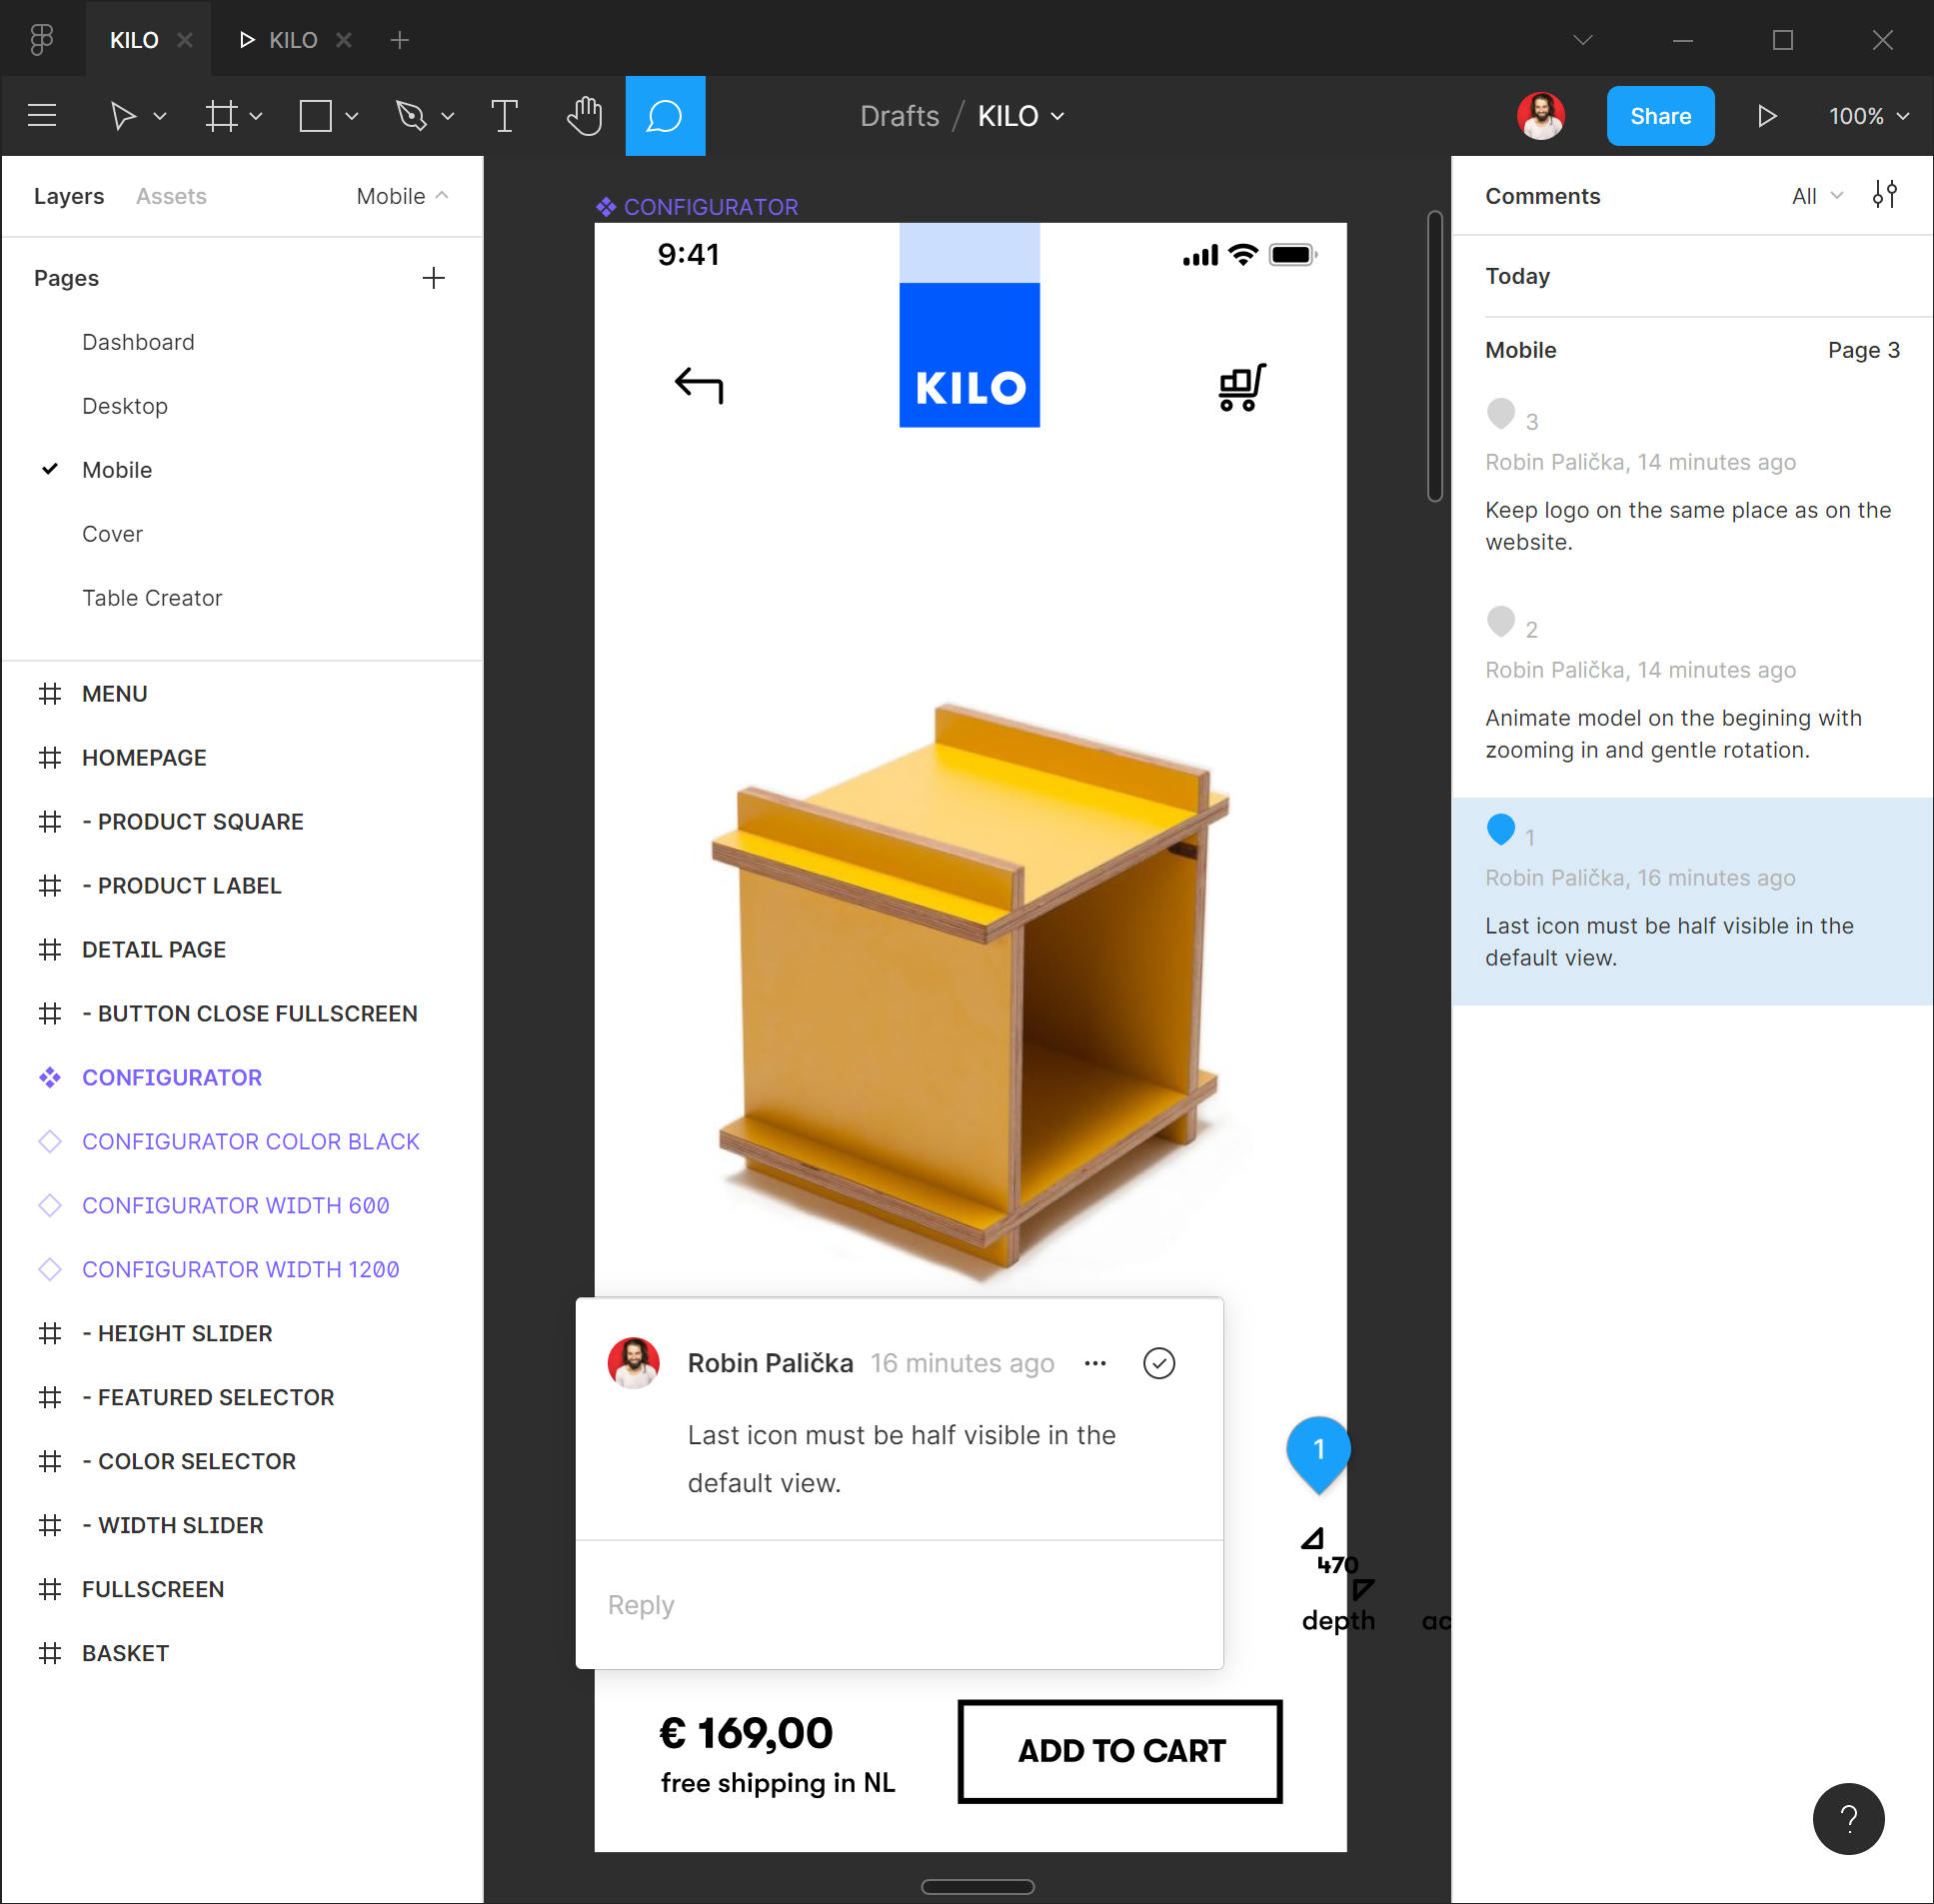
A clickable prototype helps to align the whole team, and once everyone understands what should be built, we can discuss feasibility and iterate on those designs. It’s cheaper to solve problems early in the process than later in the development phase. In addition, prototyping tools allow you to comment on individual parts of the prototype with pinned notes. This makes it easy to discuss each feature in place, and have the right context every time.
Once you have successfully iterated your prototype design with your teammates, you can move on to the user testing phase. User testing in this phase is more about validating specific assumptions, as the prototype doesn’t cover the entire functionality. It does, however, give you the first outside feedback and might prevent costly mistakes during the development phase.
Now we have an idea of how to work with prototypes, the benefits they bring, and the various processes involved. The right question to ask at this time is: what kind of tools do we use? Well, follow your heart. Modern prototyping tools—Figma, Adobe XD, Sketch, InVision, ProtoPie—all help us achieve similar goals, so go with your personal preference.
You probably noticed that most of the screenshots here come from Figma, which is the tool I use the most. Figma was designed for collaboration and easy sharing. It has a free tier, and you can use it either in the browser or in their native desktop app. If you are curious about which apps others are using, you will probably love scrolling through the 2020 Design Tools Survey.
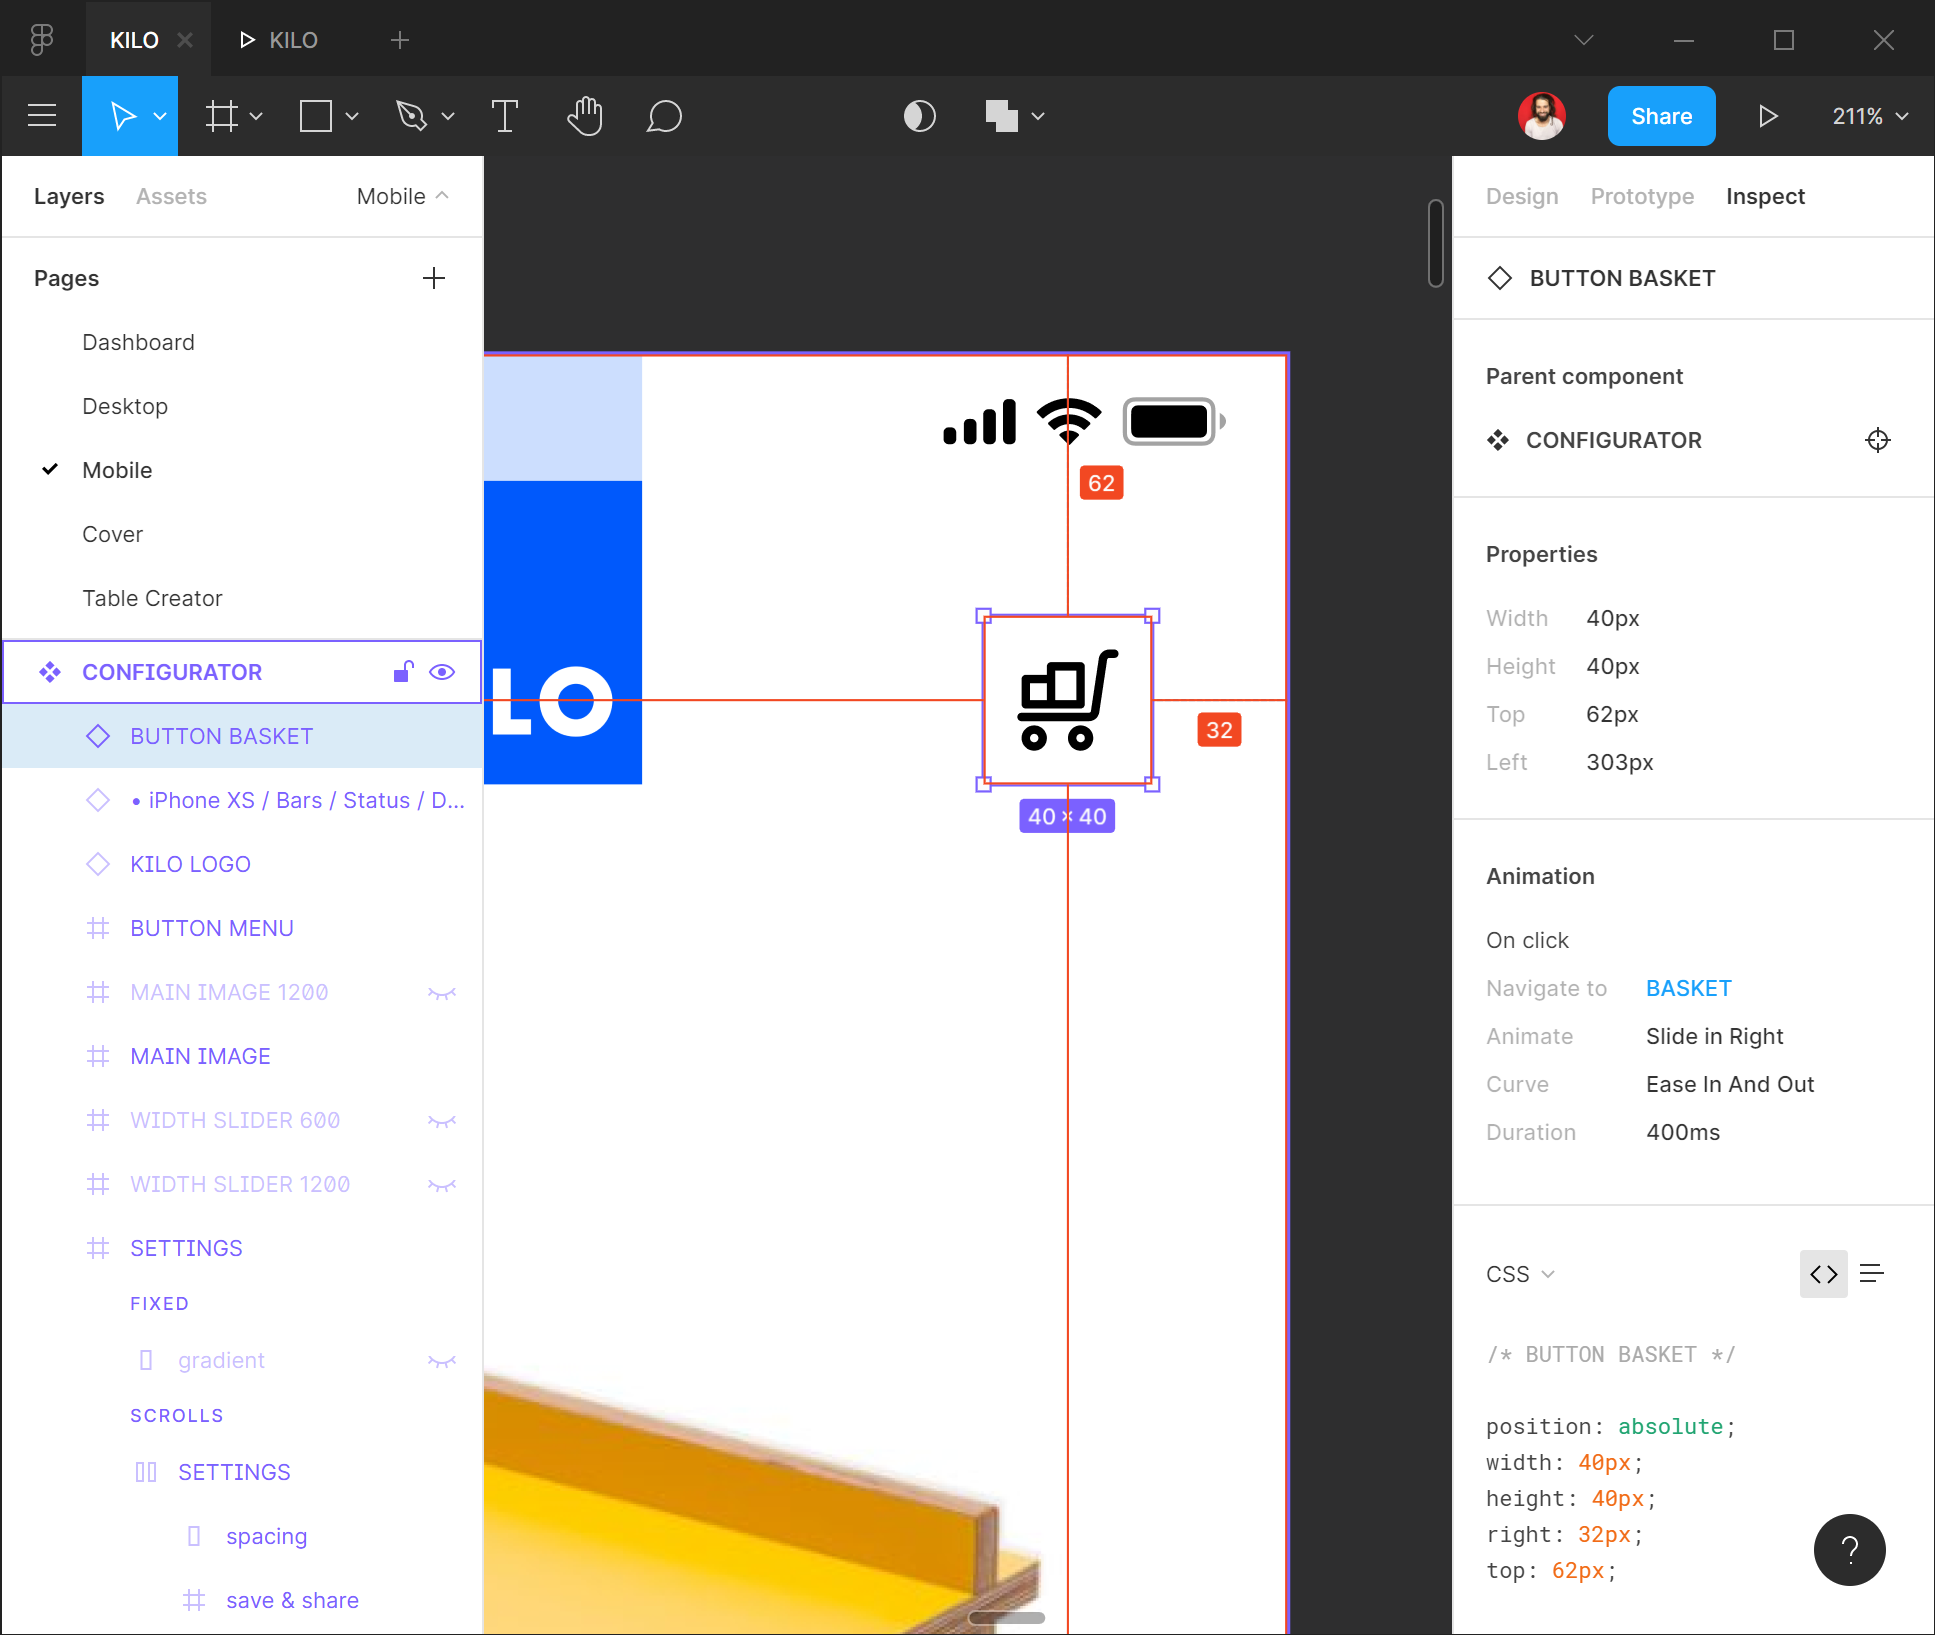
Once prototyping is done and feasibility is verified with the team, you should move onto the coding phase. Prototyping in earlier phases really helps us in the development phase. If we are thinking in the context of HTML and mobile apps, most of the prototyping tools allow us to grab a code specification for each element. The prototype also contains all the assets in one place and a well-made prototype allows you to capture them in a few clicks. Guides help you make pixel-perfect alignments and even animations could be copied from the prototype.
The following example is taken from Figma’s code section. It provides all the necessary information for developers. It’s also common to place all components—buttons, inputs, icons, etc.—onto a single page to create a sort of self-documenting component library.
Once you dive more into prototyping, you will face hidden challenges in the initial stages. As we already mentioned, the first thing to do is to choose the right fidelity in the initial phase of your project and keep the balance between easy and fast changes while moving towards a higher-fidelity clickable prototype that covers the main use cases of your app.
On larger prototypes, it’s a bit tricky to keep all the parts clean and share only the final version of each view with stakeholders. Prototyping tools are designed to make your components reusable and organize the whole structure into layers, frames, and pages. Combine all of these abilities and develop your own method of organization that fits your project and helps others to orient themselves in the prototype.
Are you curious what's behind the successful kick-up of new projects? Have a look at: Case Study: How to Run an Effective Remote UX Workshop


